How to Make Wooden Clothespin Dolls
- rachelclaredesign
- Feb 27
- 4 min read

Buying heritage dolls and wooden toys is expensive. But you can accomplish that same beautiful, old-fashioned feeling on a small scale — and for way less cost — by making mini dolls out of wooden clothespins.
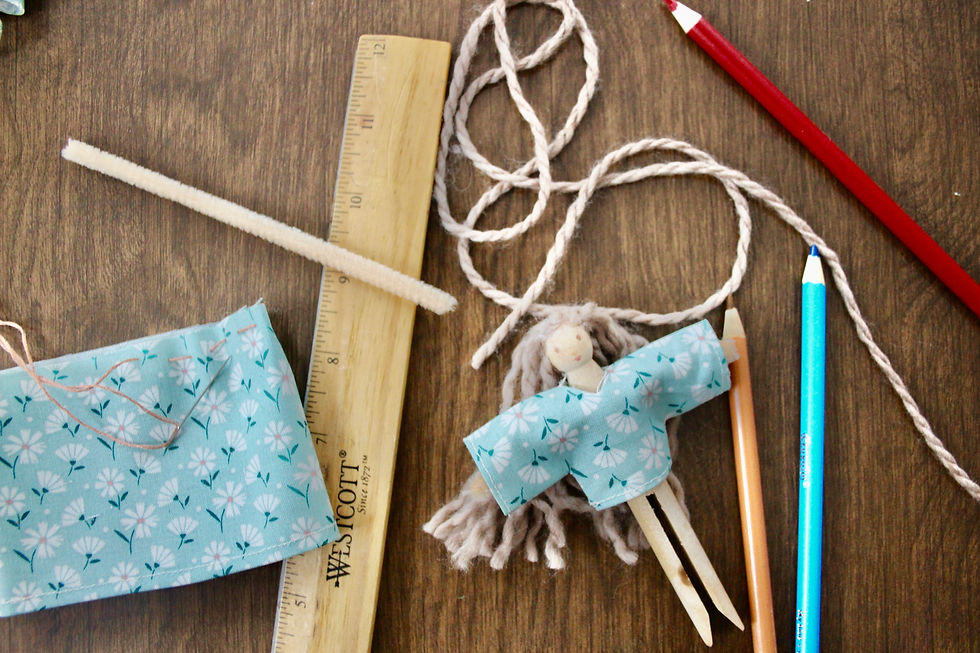
What You'll Need
Equipment
Hot glue gun
Sewing machine — helpful but optional, as you can make these small, simple dresses with hot glue!
Needle
Scissors
Iron & ironing board (helpful but not crucial)
Ruler or measuring tape
Materials
At least an 8" × 8" square of scrap fabric (for one doll's dress)
wooden clothespins
Yarn (ideally soft chunky yarn or woolly yarn)
Natural-colored pipe cleaners for arms
colored pencils for drawing a face
embroidery floss
How to Make a Wooden Clothespin Doll Step-by-Step
Steps:
1: Draw on the Face
I recommend starting with this step, or at least drawing the face before you eventually attach the dress to the clothespin. If you aren't happy with the results, you can try again without having to remove the dress.
Make sure to orient the clothespin so that the two "legs" are facing the right direction, centered below the face.

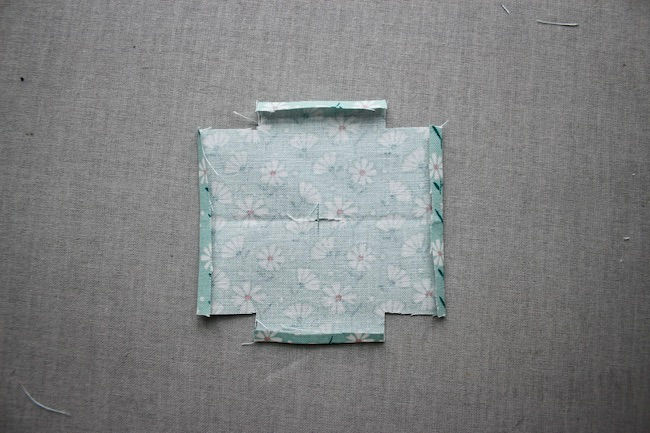
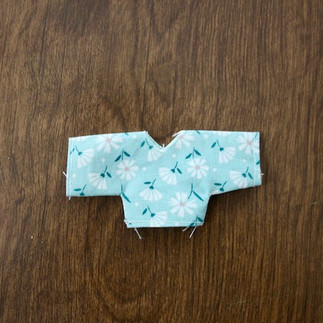
2: Cut out and prep dress pieces
If your fabric is patterned, make sure the pattern is oriented right-side-up before cutting.
Cut out a 10" × 4" rectangle from your fabric for the skirt.
Cut out a 3.75" × 3.5" inch piece of cloth, for the bodice.
Fold the bodice piece of fabric in half, top to bottom. Iron the fold to make a nice crease, trim edges so they match up.


With the fold at the top, cut out 1.5" x 1" rectangles in the lower corners of the bodice piece to form sleeves.

With the non-patterned side off the bodice facing you, fold in and iron the ends of the sleeves and the waist line.
Cut a small cross in the center off the piece for a neck hole.
Now lay down the skirt piece so the non-patterned side is facing you. Fold up the bottom edge of the rectangle about a quarter inch, and iron the fold so that it stays folded on its own.

3: Assemble Dress
Start with the skirt piece. Stitch or hot glue down the fold you ironed earlier, creating a hem at the bottom of the skirt.
Fold the skirt in half so the pattern is hidden, and stitch or hot glue the side edges together.
Now the bodice piece. Stitch or hot glue down the four folds you ironed — the two sleeve ends, and the two waistline hems.


Re-fold thhe bodice piece so the fabric pattern is hidden.
Stitch or hot glue the L shape along the bottom of each sleeve down to the waist opening.
Fold down the corners created by the snipped cross and secure each flap with a tiny dot of hot glue.
Turn the bodice right-side in. it may help to us the end of a colored pencil to guide the fabric through.


4: Attach the hair
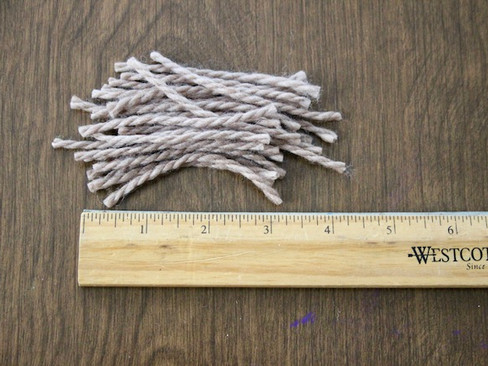
Depending on your yarn's thickness and texture, decide whether you would like to unravel lengths of the yarn to make finer hair, or leave it twisted for thicker locks. Experiment with a few pieces to see what you like best.
Cut 20-25 pieces of yarn that are 3 inches long. This is probably longer than you need, as you can give your doll a haircut later.
If you are unraveling your yarn, go ahead and unravel them, but leave them in loose clumps so they're easy to handle.


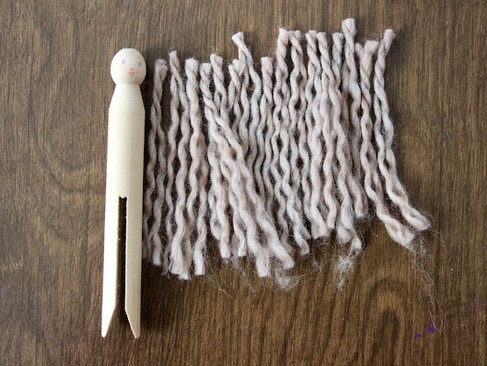
Starting at the base of the dolls head, apply hot glue gun in a row about a quarter of the way around. Press the ends of a clump of hair into the glue, then quickly repeat with a few more clumps before the glue cools.
Working row by row from the bottom of the head upward, apply enough glue for a few yarn clumps of hair, then press in the ends of the yarn. Only apply as much glue as you can use before it cools.
As you near the top of the head, use only small dots of glue to avoid a messy appearance as much as possible.


Trim your doll's hair to your preferred length.
5: Make the Arms
Cut a 6.5" length of pipe cleaner.
Wrap the pipe cleaer around the doll, criss-crossing them in the front, then bring them back out to the sides to create the arms.
Fold over the ends to remove sharp points.
Secure in place with a dot or two of hot glue.

6: Dress the Doll
Trim skirt height to thhe length you want, removing the top, not the hemmed bottom!
Use your needle and embroidery floss to sew small, but not tiny, stitches around the perimeter of the skirt top. This will be used to draw the skirt into a gather.
Put the bodice on by inserting the legs through the neckline and pulling it up.
Put the skirt on your doll and use the the thread to scrunch up the skirt. Once the skirt is tight around the doll, tie the thread ends into a secure knot and trim. Secure the skirt to the doll with a dot of hot glue, keeping the bodice out of the way.


Now smooth out the bodice. so it extends over the upper gathered area of the skirt. Using the needle, encircle an embroidery floss belt around the waist, placing a small stitch in each side to keep it in place.
Draw the belt tight and tie a bow in the front or back of the dress.

Your doll is complete!
Doll Variations:
Tucked-in Bodice
Decide your skirt length, trim, and hem the top of the skirt as well as the bottom. Pull the skirt over the bodice to allow the gathered skirt top to show. Tie a nice bow in the front or back.
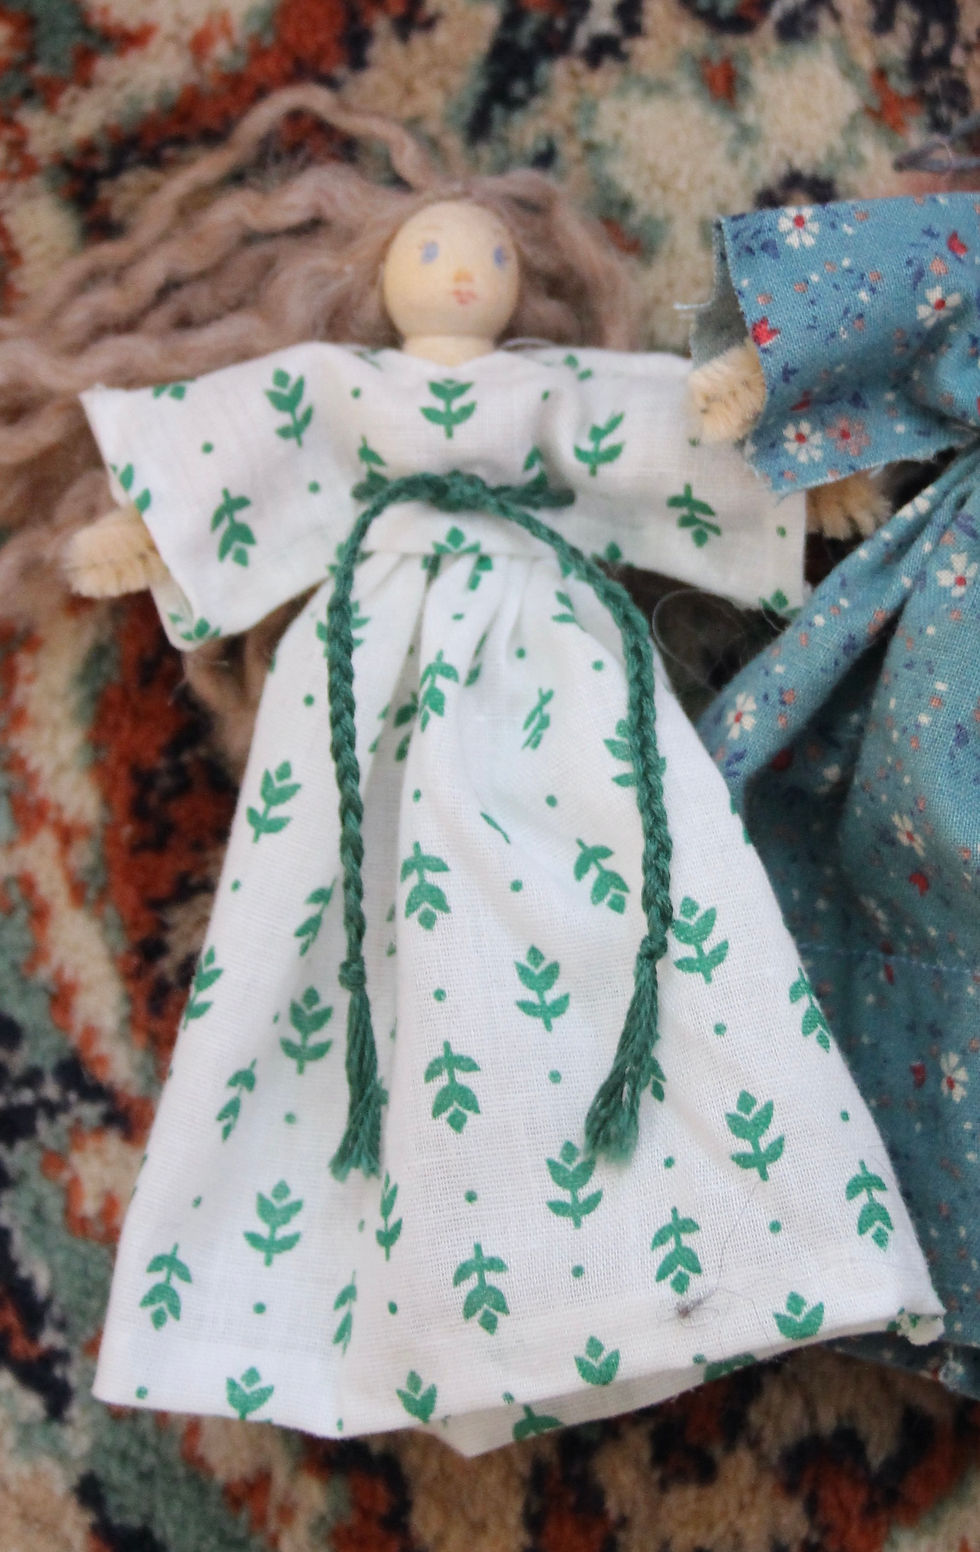
Braided Belt
One at a time, stitch three separate pieces of embroidery floss around the waist so that they emerge on the right and left on the doll's front. Leave long tails on both sides. Braid each side, knot the ends, and tie the braided belt into a knot.
Hair Styles
Use embroidery floss to tie a braid or pony tail.


Comments